How to send a postcard from your phone
Everything happens on one page. There is no app to download, and you do not need an account unless you want your addresses remembered. Nothing is printed until you pay, and you see both sides of every card before that.
1Send one postcard
About two minutes, start to finish. The page is numbered 1 to 5 and you can work down it in any order — it tells you at the bottom what is still missing.
- Pick your photo. Under 1 Front of Postcard (Your Photo), tap Tap to upload a photo. There is nothing to set first — the card takes its shape from the picture. The Landscape and Portrait buttons are there if you want the other one.
- Add text on the photo, if you want. Use + Add text to your photo for a caption. If your photo has location data, a chip appears with the place it was taken — tap it and it drops straight into the caption, which saves trying to remember where you were.
- Write the message. That is 2 Back of Postcard (Your Message). Pick a font — Handwriting, Casual Script, Printed Letter, Classic Serif or Typewriter. If you are stuck, ✨ Help with my message will draft something you can edit, tidy what you have written, or carry it on. There is also a Don't show my message on the online copy tickbox here — the printed card always carries your message, but ticking this keeps it off the web page the QR code opens.
- Add your return address. 3 From (Return Address). USPS requires it, and it is printed small in the top-left of the back so anything undeliverable finds its way home. It is remembered for next time.
- Address the card. Under 4 Recipients, fill in who it is going to. On an iPhone, tapping the name field offers Safari's own Choose Contact… above the keyboard, which fills the whole address in one tap.
- Check it and pay. See your card & pay shows you both sides exactly as they will print, under the heading This is what we'll print. Nothing goes to the press until you have paid.
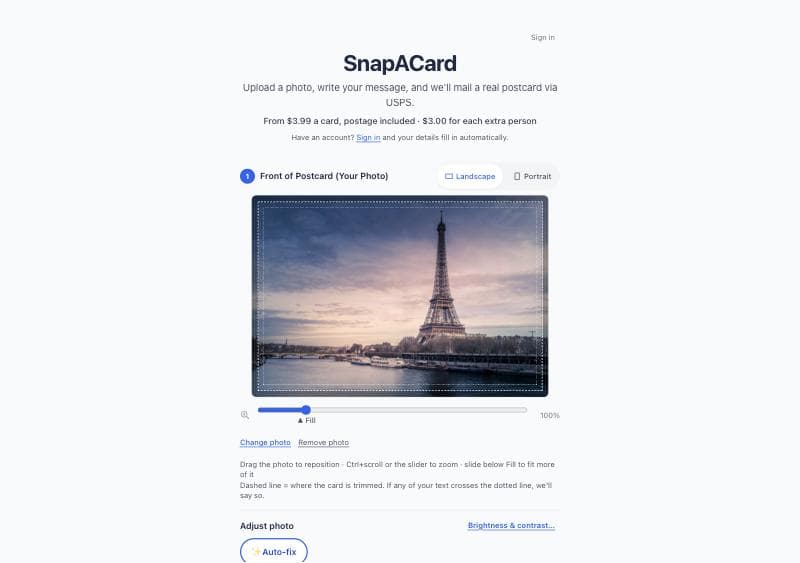
The five numbered sections, with the card preview updating as you type
What it costs. $3.99 for the first card, postage included, and $3.00 for each extra person. Heavyweight card stock with a glossy UV-coated front. Printed and mailed within 2–3 business days, then usually 3–10 business days with USPS First-Class Mail.
2Send the same card to several people
Same photo, same message, many envelopes — the usual case for holiday cards and thank yous. Build the card once as above, then add people.
- One at a time: + Send this card to more people, $3.00 each, then + Add Another Recipient for each one after that.
- From a spreadsheet: Upload a spreadsheet (CSV). It reads other people's exports, not just a format of ours — it finds the header row, works out which column is which, and shows you the mapping and any repairs it made before a single row is added.
- From a photo of a list: Photo of an address list, for a handwritten page or a card list on paper.
- From your phone's contacts: Import from Contacts file — see below.
With more than one recipient you also get a greeting style — Hi, Dear, Name only or No greeting — so each card opens with that person's name instead of a generic line.
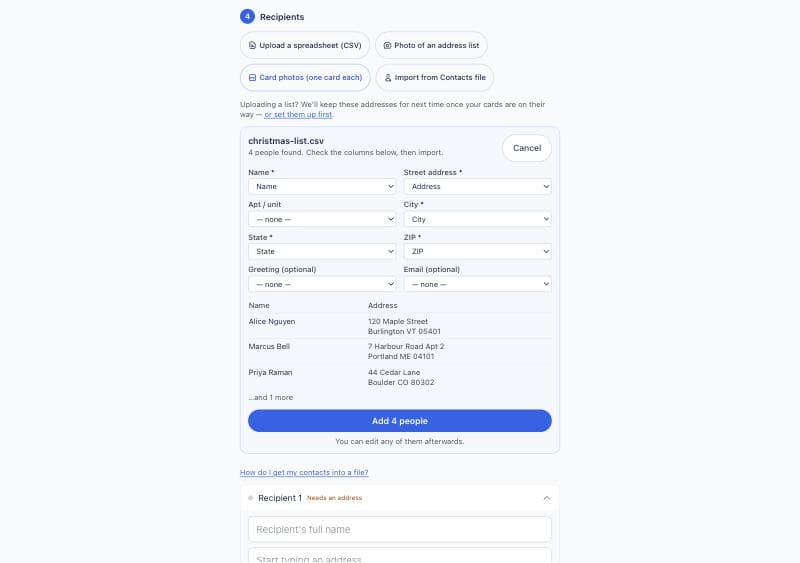
A spreadsheet is checked column by column, and shown to you, before a single row is added
3Give everyone a different photo or message
Once there is more than one recipient, a Personalize each card panel appears with two independent switches. You can use either, or both.
- A different photo for each person — off, every card carries one photo, one crop and one caption. On, each recipient gets their own picture.
- A different message for each person — off, the same note goes on every card. On, everyone starts from the message you already wrote and you change the ones you want.
The fast way to do photos: at step 1, select several photos at once. As the hint under the upload button says, pick more than one and each photo gets its own card — you get one recipient per photo, ready to be addressed. One order can carry up to 25 different photos.
You only change the ones you want to change. Turning on A different photo for each person does not empty anybody's card. Every card keeps showing the first photo you picked — each recipient is labelled Card 1's photo — until you tap Choose another on that person. So three people can share the first photo while the fourth gets their own, and you never have to pick a picture for someone you were happy with. The same is true of the message: everyone starts from the one you already wrote.
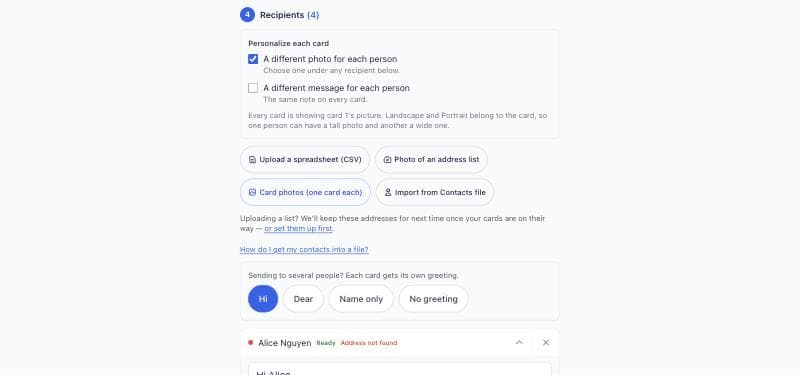
Personalize each card, switched on — every card still showing card 1's picture
4Use your address book
Your address book is built from cards you have actually sent — there is nothing to set up and nothing to maintain.
- Send a card as normal. You do not need an account to do this.
- Say yes on the confirmation screen. After paying you are asked Save these addresses for next time? Accepting creates your account at the same time — there is no separate sign-up.
- Next time, they are already there. Sign in and your saved people appear under 4 Recipients to pick from. You can edit or remove any of them at My addresses, and export the lot as a spreadsheet or as phone contacts whenever you like.
- Writing to several people at once. Tick the box beside everyone you want on My addresses — or press Select all — then press Write a card to these. The editor opens with all of them already in 4 Recipients, and anything you had started is kept. In the editor itself,Add all above the saved people does the same thing in one press.
Signing in is by emailed link, so there is no password to remember or lose.
My addresses, with the edit, remove and export controls
My addresses, with the edit, remove and export controls
5Get your contacts into a file
To import people you already have in your phone or your Google account, export them to a file first, then upload that file with Import from Contacts file. The same instructions sit behind How do I get my contacts into a file? in the editor.
Importing into My addresses ticks everyone from that file for you, so Write a card to these is the next press — no need to go hunting for the people you just uploaded among the ones already saved.
iPhone — one person
Open the contact, tap Share Contact, then Save to Files. Upload that file.
iPhone — a whole list
Contacts can only share one person at a time. For several at once, open icloud.com/contacts on a computer, hold Cmd (Mac) or Ctrl (Windows) and click each person, then Share → Export vCard. That gives you one file with everyone in it.
Google Contacts
At contacts.google.com, tick the people you want, open the menu ⋮ and choose Export, then pick vCard. Upload the file it downloads.
Everyone in the file lands in the recipient list for you to check, and nothing is sent until you pay. Anyone the file did not have a full postal address for is named in the summary — “couldn’t add Alice, Bob and 2 more” — rather than quietly disappearing, so you know who to add by hand.
The review step after importing a contacts file
The review step after importing a contacts file
6Help with my message
The ✨ Help with my message button under step 2. What it offers depends on whether you have written anything yet, and it never changes your message on its own — it shows you a suggestion and you decide.
If the box is empty
Pick an Occasion — Thank you, Birthday, Holiday, Travel, Just because or Sympathy — and a Tone of Warm, Funny or Short. There is an optional Anything to mention? box for a detail worth including. Get ideas gives you a few short drafts to pick from and edit.
If you have already written something
- Fix mistakes — spelling, grammar and punctuation. Your words, slang and emoji stay exactly as they are.
- Polish it — smoother wording, still in your voice and about the same length. Nothing new invented.
- Finish it — carries on from where you stopped. It only adds; your own words come back untouched.
What gets sent. Only when you tap it, the text you have written — or the occasion and tone you picked — goes to Anthropic to get a suggestion back. No name, address, email or photo is ever sent, including the name of the person you are writing to, even though the app knows it. We keep none of it. The privacy page says the same thing in full.
7The QR code, and following your card
Two things happen that are easy to miss, because they happen after the interesting part is over.
- Every card has a QR code on the back. The recipient scans it and your photo opens on a web page — a digital copy of the card they are holding. They need no app and no account. If you would rather your written message stayed off that page, that is the tickbox in step 2.
- You can watch it travel. Your confirmation email carries a Track your card link that updates as USPS scans it on the way. The link is private to you — though anyone you forward it to can see it as well.
Designing your own card front
Most people never need this. Upload a photo and we handle the sizing. But if you would rather build a front in Photoshop, Illustrator, Canva or anything else, these give you the exact canvas, where we cut, and how far in to keep anything you care about.
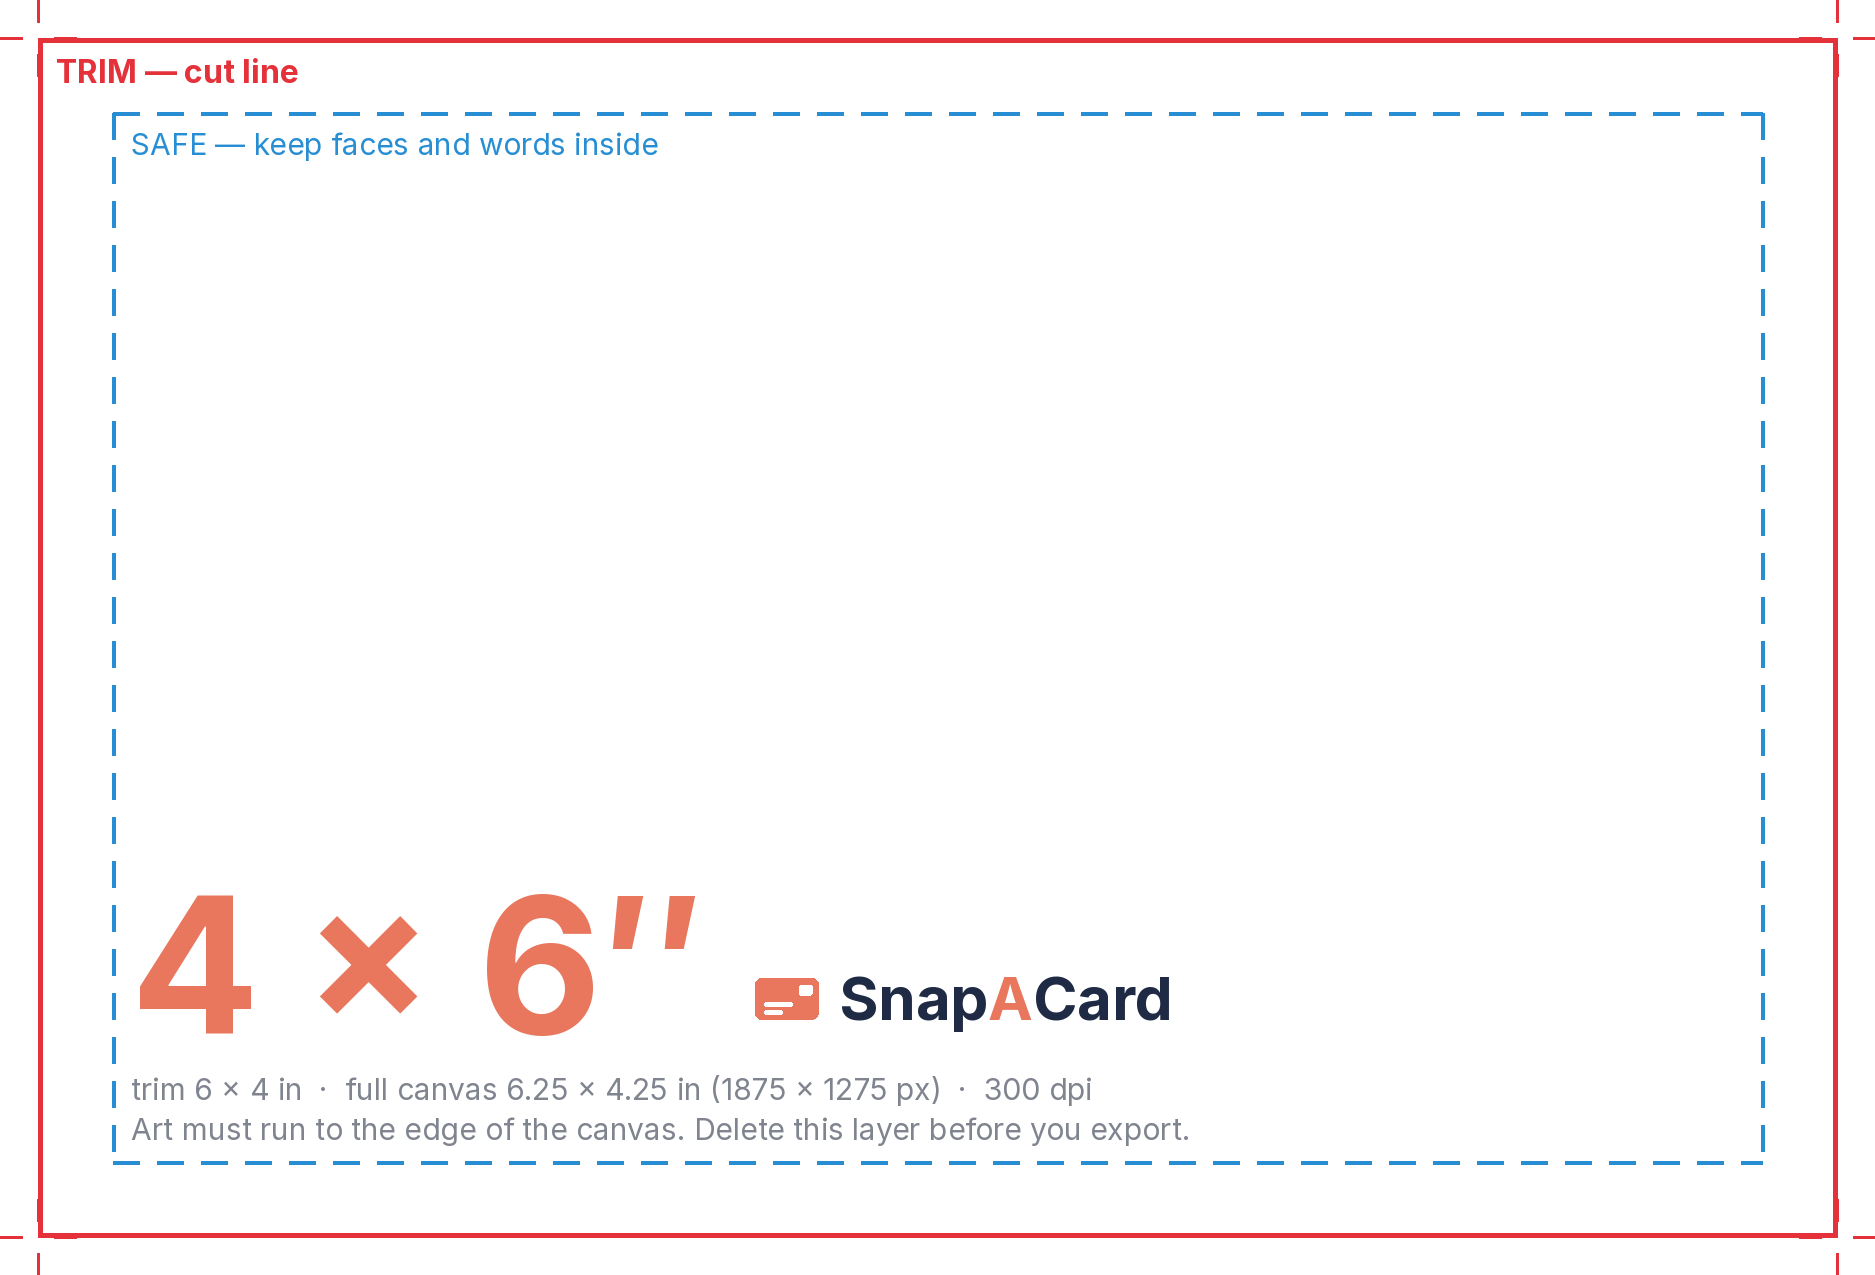
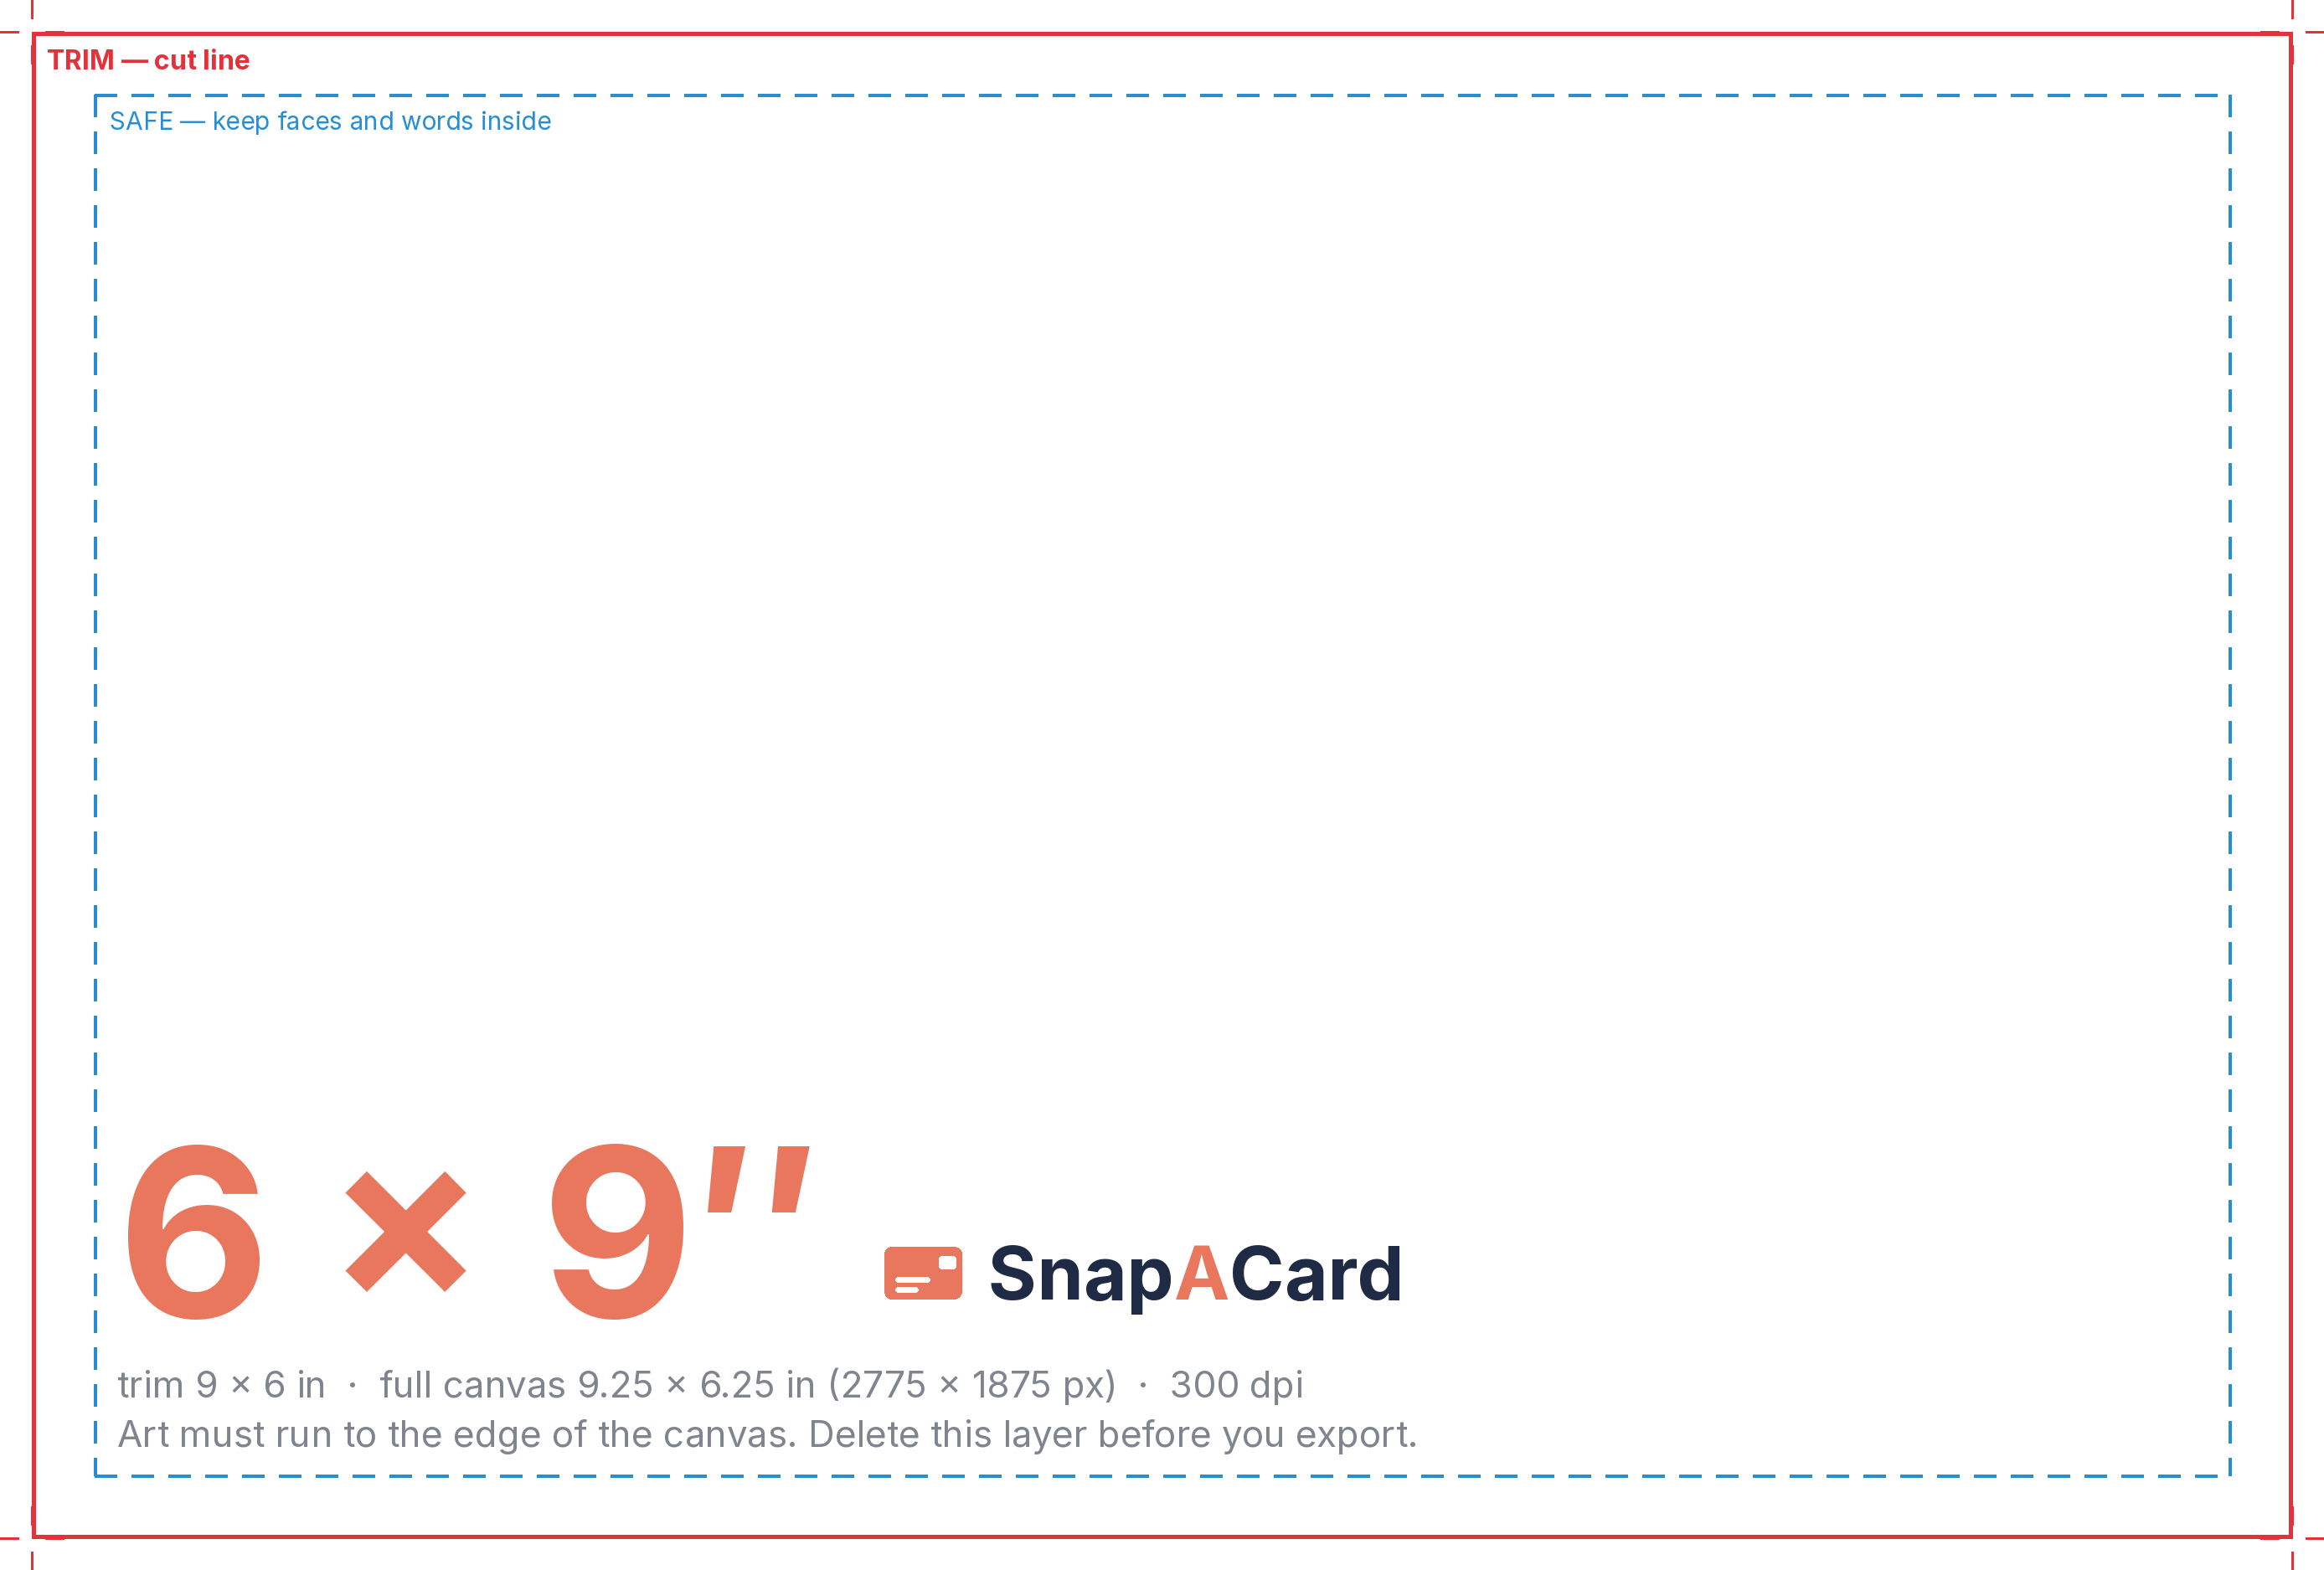
The PNG is transparent: drop it over your artwork as the top layer, line things up, then delete that layer before you export. The PDF is the same guide on white, for when you only want the measurements.
Two rules, and both are drawn on the guides. Your artwork has to run all the way to the edge of the canvas — the outer strip is trimmed off, and exactly where varies a little from card to card, so a white margin you intended will not survive. And anything you would mind losing — faces, words, a signature — belongs inside the dashed line.
Stuck on something this page does not cover? support@snapacard.com. A real person reads it.